Difference between revisions of "How to dump a HDD"
| (One intermediate revision by the same user not shown) | |||
| Line 89: | Line 89: | ||
| − | [[File:7281 1588885940451.png| | + | [[File:7281 1588885940451.png|] |
| Line 153: | Line 153: | ||
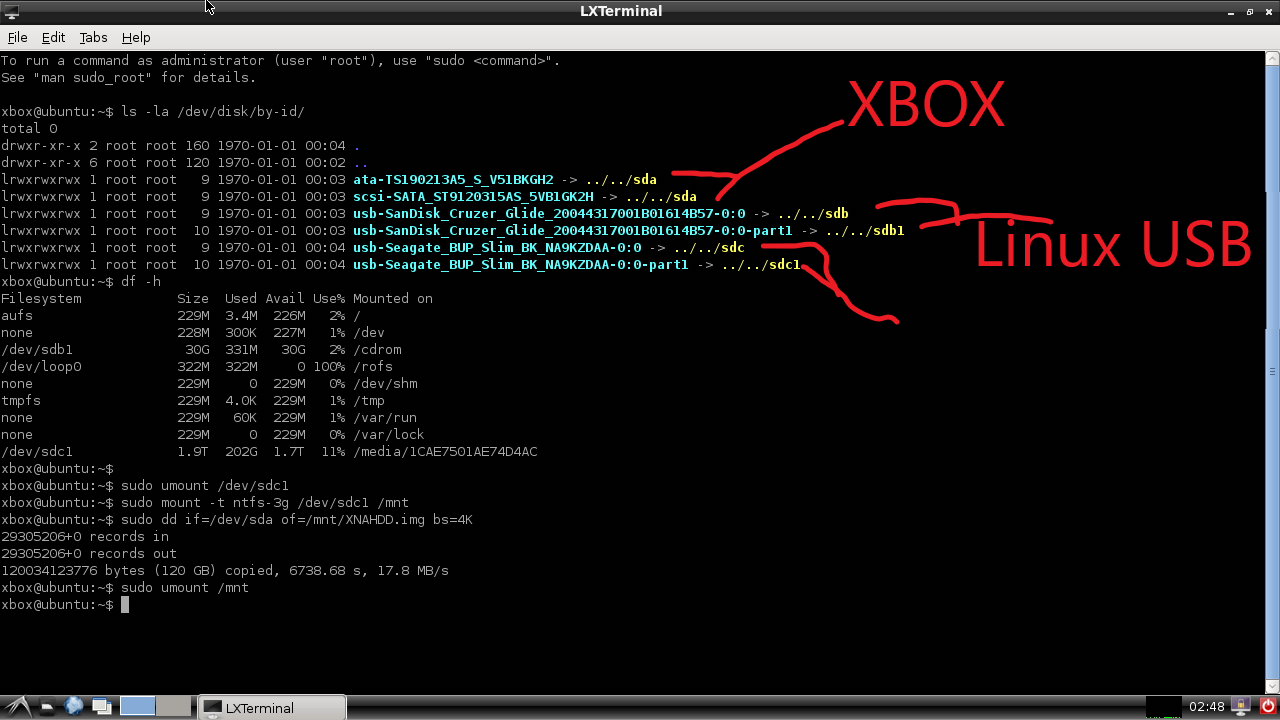
Type, "df - h" and press enter and you should be able to go off size and see what HDD is your external HDD, Mine is "sdc1" | Type, "df - h" and press enter and you should be able to go off size and see what HDD is your external HDD, Mine is "sdc1" | ||
figure out what your HDD is | figure out what your HDD is | ||
| + | |||
type, "sudo umount /dev/sdc1" this will unmount your external HDD as precaution **keep in mind to change sdc1 with whatever your HDD is!!** | type, "sudo umount /dev/sdc1" this will unmount your external HDD as precaution **keep in mind to change sdc1 with whatever your HDD is!!** | ||
| + | |||
| + | |||
type, "sudo mount - t ntfs-3g /dev/sdc1 /mnt" this will mount your external HDD as mnt and be ready to accept a HDD dump! | type, "sudo mount - t ntfs-3g /dev/sdc1 /mnt" this will mount your external HDD as mnt and be ready to accept a HDD dump! | ||
| + | |||
| + | |||
once you are absolutly sure you have the HDD mounted correct you can go ahead and dump the HDD ** if you have this backwards you will write your external HDD onto your internal Xbox HDD and lose everything, SO PAY ATTENTION! | once you are absolutly sure you have the HDD mounted correct you can go ahead and dump the HDD ** if you have this backwards you will write your external HDD onto your internal Xbox HDD and lose everything, SO PAY ATTENTION! | ||
| + | |||
| + | |||
type, "sudo dd if=/dev/sda of=/mnt/NAME_YOU_CHOOSE.img bs=4k" and press enter | type, "sudo dd if=/dev/sda of=/mnt/NAME_YOU_CHOOSE.img bs=4k" and press enter | ||
| + | |||
| + | |||
""dd if= is saying take the xbox hdd, and of= is where to place it, mnt is the root folder of your external as we mounted it as such."" | ""dd if= is saying take the xbox hdd, and of= is where to place it, mnt is the root folder of your external as we mounted it as such."" | ||
| + | |||
| + | |||
this can take almost 3 hours so wait till you see new text show up about records in and out | this can take almost 3 hours so wait till you see new text show up about records in and out | ||
| + | |||
| + | |||
once you see that it is done, you NEED to type, "sudo umount /mnt" to unmount your HDD and put it back to normal. | once you see that it is done, you NEED to type, "sudo umount /mnt" to unmount your HDD and put it back to normal. | ||
| Line 164: | Line 177: | ||
You can now use Fat-X tools to look at the img! | You can now use Fat-X tools to look at the img! | ||
| − | [ | + | [https://github.com/aerosoul94/fatx-tools FatX Tools By Areosoul] |
Latest revision as of 20:19, 27 June 2020
How to Dump Using Network: Coming Eventually
How to Dump Xbox 360 Onto External HDD
Time: 2 ~ 3 hours maybe less If its a Phat Test kit you will need the shadowboot file for test kits!
Nothing on your External HDD will be lost if you mess anything, need at least 120GB free.
I am not responsible if you corrupt your HDD or accidentally dump your HDD to the wrong spot!
Quick Tips
DO NOT PRESS ANYTHING ONCE YOU PRESS ENTER ON THE DD COMMAND.
MOVING THE MOUSE TO REMOVE THE SCREENSAVER IS OK!
IT WILL SAY IN TERMINAL WHEN IT IS FINISHED!
>>>>Potential Dangers:<<<<<
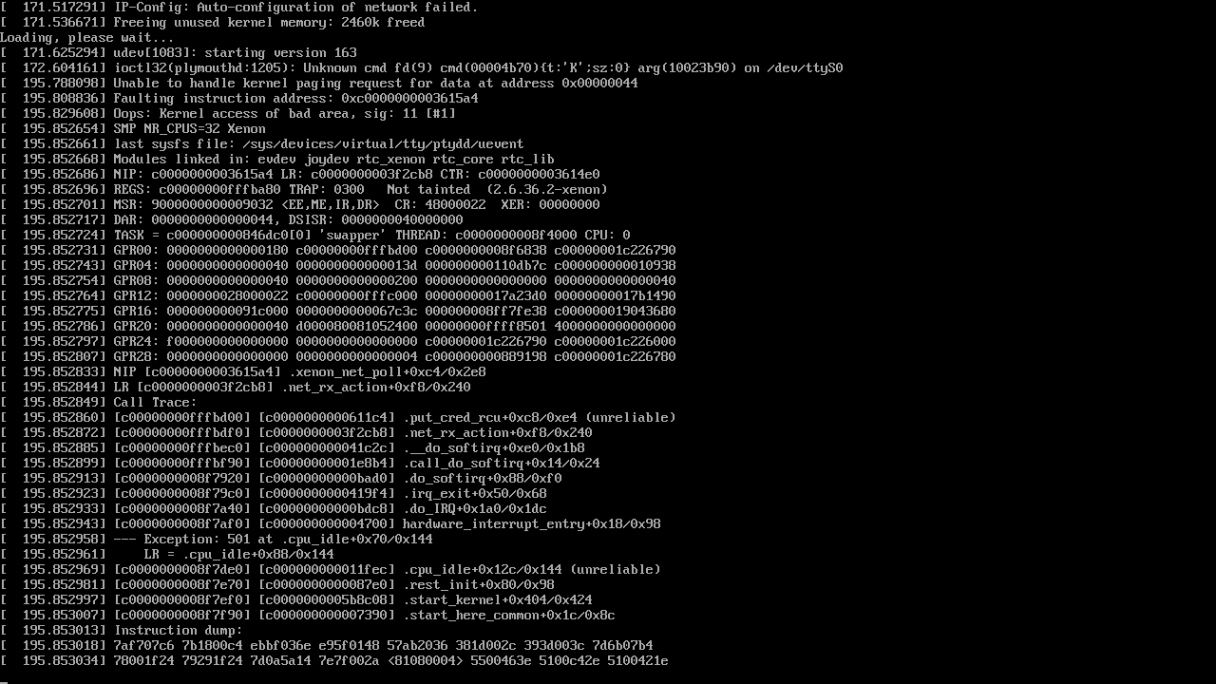
Linux seems to be pretty stable but it can crash if: You try to open anything in Linux while dumping HDD. Unplug the HDD Random crash? (may be from me swapping mouse and keyboard) A crash will cause a IO error on your external HDD, Easy fix below.
WHAT TO DO IF YOUR EXTERNAL HDD GETS I/O ERROR
If for whatever reason Linux crashes or you have to restart, chances are your HDD will get a IO error, to fix this, plug it into a windows PC and it will ask you if you want to fix the error, just say yes and it will delete the incomplete img file.
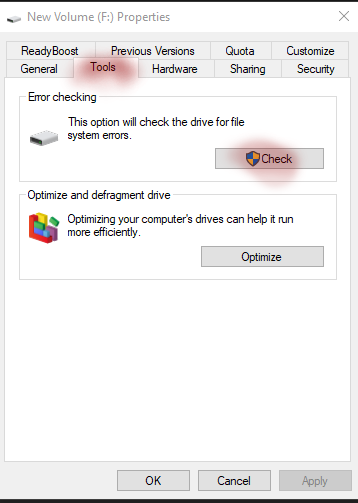
If you plug it in and it doesnt give that message but you cannot open your HDD anymore, right click the HDD from My Computer, Go to Properties, Tools and then Check. it will fix the error.
== DOWNLOAD: ==
       Linux for 360: Linux for 360
       XellLaunch:  XellLaunch
       Shadowboot Bin: Shadowboot Bin
- Important, USB i am talking about until Step 5 is the small one for running Linux, not your external HDD you want to save the backup to.
=== Step 1: ===
Make sure to use a fat32 USB Stick
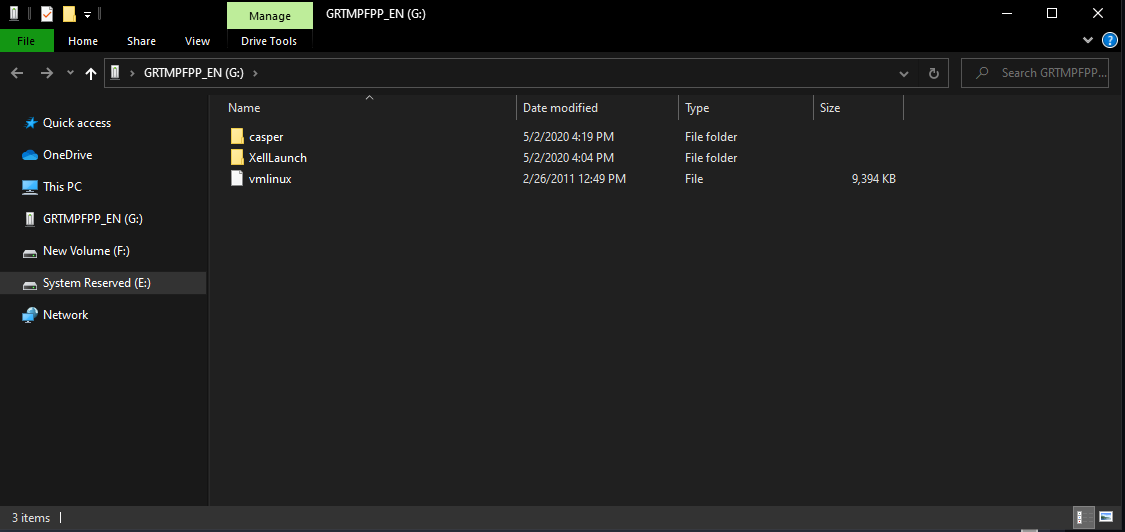
Extract Linux onto root of USB. There is 3 files vmlinux and a folder called casper with a file called fileysystem in there.
Extract XellLaunch to the root of USB.
Put xboxromw2d.bin into a folder on your PC.
=== Step2: ===
Open Game Disc Emulator Layout. It is part of the Microsoft Xbox 360 SDK *Should not need full installation of the SDK
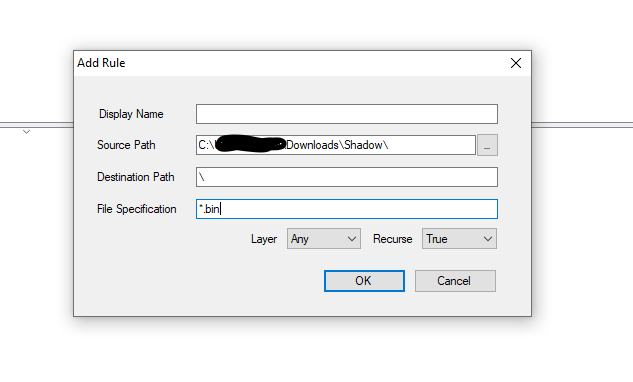
Right Click Rules, Click Add New Rule
Leave display Name Empty
Source Path is the folder you put xboxromw2d.bin into
Leave Destination Path Alone
In File Specifications, put *.bin , then press OK
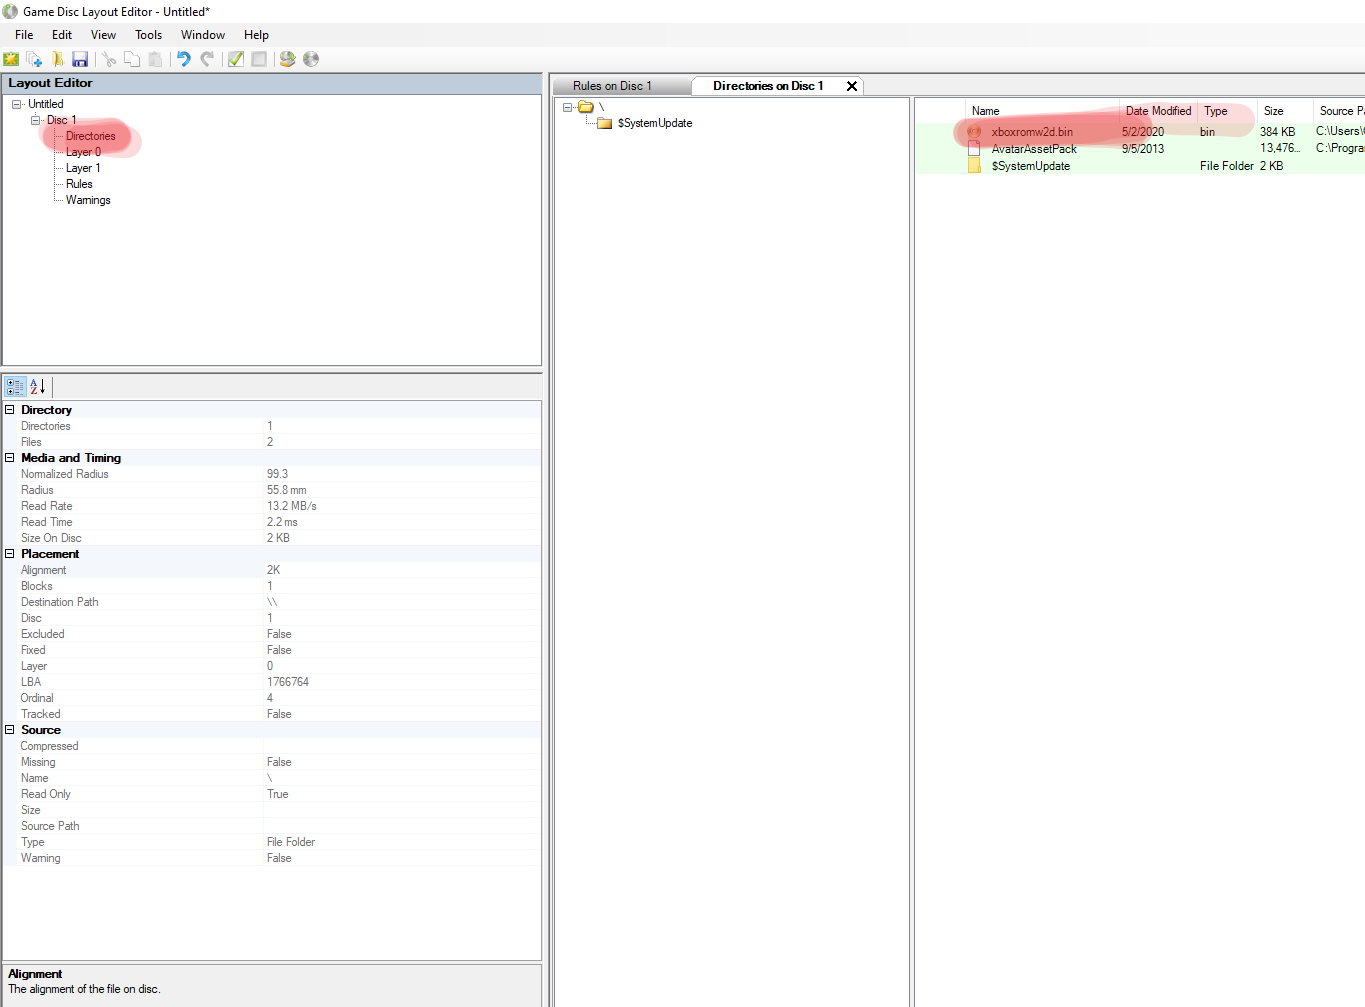
double click Directories on top left and you will see the xboxromw2d.bin has been added
go ahead and press File then save, and save it into the same folder as xboxromw2d.bin
[[File:7281 1588885940451.png|]
Close Game Disc Emulator Layout
=== Step 3: ===
If it is a phat Xbox 360 I recommend taking off the front face plate so you do not risk the USB cover breaking (there getting fragile) You will have to unplug and swap mouse for keyboard ONCE as you will not have enough USB ports
=== Step 4: ===
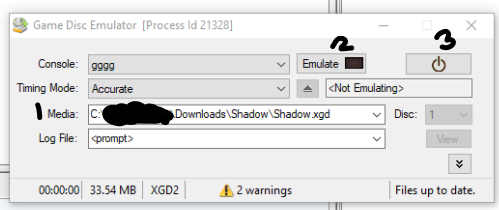
Make sure XDK is turned off Plug Your USB with Linux on it into one of the slots of the Xbox Plug in your keyboard and mouse into the other 2 slots Plug in Sidecar HDDEMU cable into PC Open Game Disc Emulator, it is part of the Xbox 360 SDK In Console you should see your XDK name pop up (1)Locate your XGD file you just created under media (2)Click the button that says Emulate (3) Click the power button directly to the right of the Emulate button
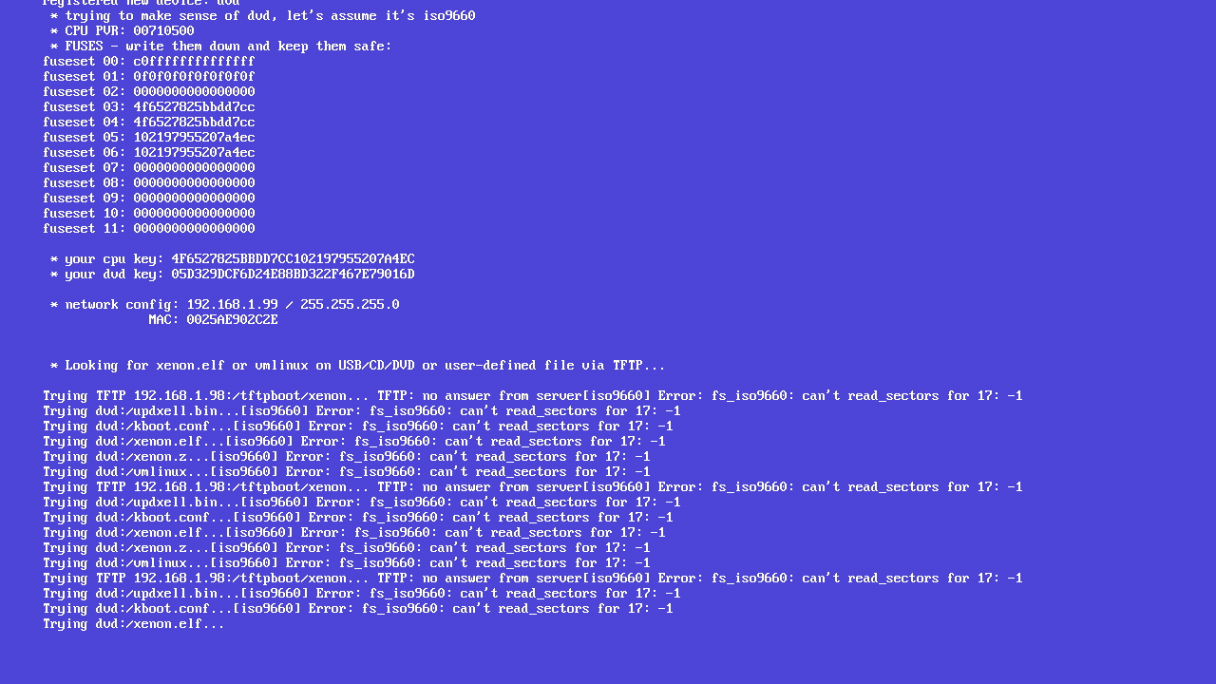
Your Xbox will turn on by using the sidecar and if you have the USB formatted correctly and the files in the right spot, your Xbox will display XELL
Once you see the XELL screen, go to Game Disc Emulator, Click the Emulate Button again * If not Linux Will hang, this is mandatory
Let Linux boot (3-10 minutes) pay attention for any crashes you will have to restart the console and redo Step 4
====Step 5: ===
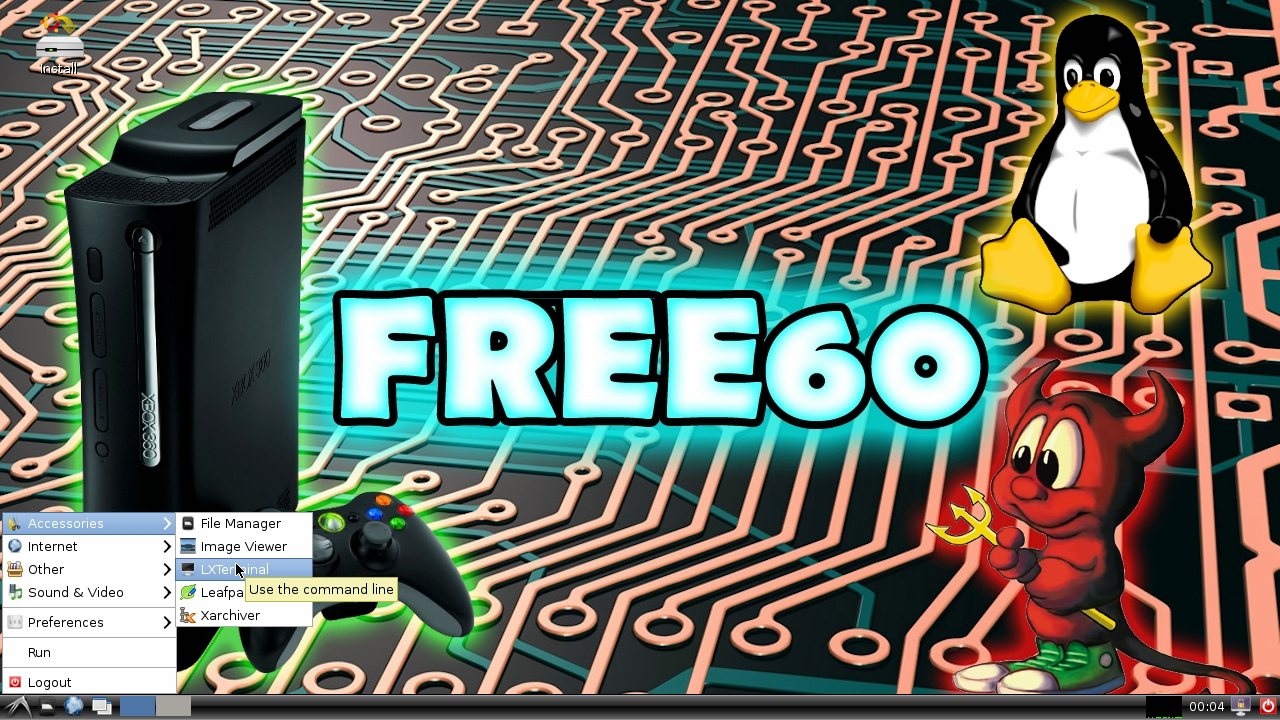
Once inside Linux, unplug your keyboard, plug in your external HDD in its place a message will open , close it Once you are on the Linux Desktop use the mouse and and go to the bottom left and click it, click Accessories, LXTerminal [
click inside the terminal window to make sure you are using it
unplug your Mouse from the Xbox, and plug in your Keyboard
WE ARE NOW IN SOMEWHAT DANGEROUS PARTS NOW
- The next few lines will have stuff for you to type, they will be in "quotes", do not include the quotes when you type the commands
Type, "ls-la /dev/disk/by-id/" and press enter. you will see a list of drives (your list will be different)
Type, "df - h" and press enter and you should be able to go off size and see what HDD is your external HDD, Mine is "sdc1"
figure out what your HDD is
type, "sudo umount /dev/sdc1" this will unmount your external HDD as precaution **keep in mind to change sdc1 with whatever your HDD is!!**
type, "sudo mount - t ntfs-3g /dev/sdc1 /mnt" this will mount your external HDD as mnt and be ready to accept a HDD dump!
once you are absolutly sure you have the HDD mounted correct you can go ahead and dump the HDD ** if you have this backwards you will write your external HDD onto your internal Xbox HDD and lose everything, SO PAY ATTENTION!
type, "sudo dd if=/dev/sda of=/mnt/NAME_YOU_CHOOSE.img bs=4k" and press enter
""dd if= is saying take the xbox hdd, and of= is where to place it, mnt is the root folder of your external as we mounted it as such.""
this can take almost 3 hours so wait till you see new text show up about records in and out
once you see that it is done, you NEED to type, "sudo umount /mnt" to unmount your HDD and put it back to normal.
You can now use Fat-X tools to look at the img!
